After trying to export the form work into CryEngine it was found that it wasnt exporting properly.
After Tim and Dan trialled different methods of exporting it was found that this was due to a large poly count (the PlayUp plugin can only export a certain amount of polygons at once). To help with the process I simplified the model into smaller groups that will hopefully make the exporting process easier.
Sunday, 26 May 2013
Sunday, 19 May 2013
Week 11 - Modelling Formwork
Due to previous complications with the form-work's large poly count, the form work needed to be re-modelled.
Considering the problems that occurred when exporting 3DS files to Sketchup and the limiting time restraints, I decided to model the form work in Sketch up.
The majority of this form work was done within 2 days (doing a couple of all-nighters) and allowed the rest of the group to see the model and make alterations as needed.
After everyone was happy with it, I made sure that each part of the model was grouped into construction stages to allow for an easier exporting process for Tim and Dan.


Sunday, 12 May 2013
Week 10 - Plasterboard and Export
After I had finished modelling the stud work, I began on modelling the plasterboard for the house.
Due to the relatively easy process of modelling plasterboard, I was able to complete this stage quite quickly which allowed me to begin exporting/importing to sketch up.
When imported to sketch up various complications were discovered: excessive lines (forming triangulated patterns) and components missing.
I had previously worked out the solution to the problem of missing components, so after going back into the 3DS file and ensuring that all components were 'unique' I was able to successfully import the model to sketch up.
The problem of extra lines appearing on the model proved to be problematic within Sketchup, however when imported into CryEngine they didn't show up. For this reason we left the majority of the extra lines in the model, to ensure we didn't waste time cleaning up unnecessary parts of the model.


(At this point, materials weren't textured. Instead, they were coloured differently depending on which stage of construction they were linked to)
Sunday, 5 May 2013
Milestone
For my contribution to the group, I have been in charge of modelling the stud work for the house in 3DS max. In later stages this will also include modelling the gyprock and insulation Within this task I have also had to research various parts of the BCA to ensure that the structure of the house complies with the required regulations. By contacting a qualified carpenter i was able to get the required information quickly and efficiently to allow for me to sepd less time researching, and more time modelling accurate stud work.
Whilst modeling the house i became aware of a number of complications which i had to resolve along the way. Most of these were related to the structure of the house and to the accuracy of the imported model from Revit. Some of the issues discovered included: beams span exceeding maximum length, glass panelled sections of walls being load bearing, bearers poking through windows, and internal walls exceeding maximum heights.
Modelling Development:

Original Imported Model

Begin modelling internal walls

Top view showing walls

Showing all external and internal walls finsihed


Separating the top floor external stud wall from the ground floor stud wall

Finished model with altered windows and additional structural members as required
Model Issues
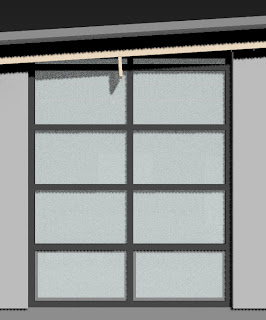
Issue 1: Roof bearers sticking through windows

As can be seen the roof bearer is actually sticking through the glass window. This obviously cannot be possible and is an error with the Revit model

This problem was corrected be editing the window so that it sits below the ceiling bearer
Issue 2: Roof rafters have too long of a span

The roof rafters in this model span 20m, which is too long to comply with the BCA

This error was corrected by placing a column under a Roof bearer two thirds of the way along the span
Issue 3: The glass window wall was load bearing, but not structurally strong enough

The glass panel wall has a heavy load placed on top of it from the roof and would not be able to withstand the forces placed on it

By placing a steel member along the corner edge of the house, it can take the load from the roof away from the glass windows. This provides a much stronger house.
Export/Import Issues:
After working on exporting the model and importing to SketchUp I noticed that it was specific components that werent being carried over. After examining these components in 3DS Max I saw that the components that weren't exporting properly were instanced components and all I had to do to fix the problem was make them unique.
After making sure all components were 'unique components' they all exported to SketchUp without any issues.
Subscribe to:
Posts (Atom)